
Battle of Bywater: The Last Fight in the Shire
Hobbits Rise to Defend Their Home
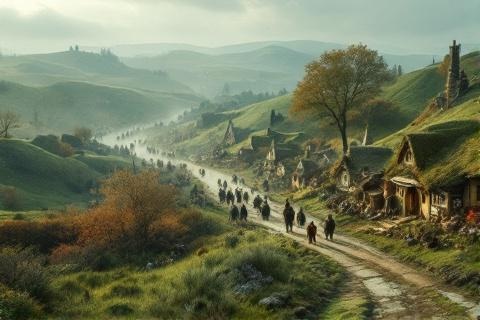
Return to a Changed Shire

When Frodo, Sam, Merry,
and Pippin returned to the Shire in November of 3019 Third Age, they found their
beloved homeland dramatically changed. The once peaceful and welcoming
countryside had become hostile and unwelcoming, with large gates blocking the
road at the Brandywine Bridge. Their initial shock at these changes was
compounded by the realization that their fellow hobbits seemed
fearful and subdued.
The returning heroes encountered numerous signs of oppression throughout the
Shire. Large numbers of new rules and regulations were posted everywhere,
enforced by groups of surly Men who called themselves the Chief's
Men. These rules restricted everything from the use of inns to the sharing of
food and goods between hobbits, creating an atmosphere of fear and suspicion.
Hope emerged in the form of Farmer Cotton, who had been quietly organizing
resistance against the oppressors. The well-respected farmer from Bywater had
been gathering like-minded hobbits who refused to accept the new order, creating
a network of resistance that would prove crucial in the coming battle.
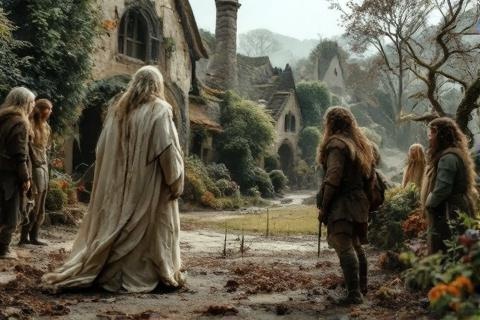
The Tyranny of Sharkey
The mastermind behind the Shire's transformation was revealed to be
Saruman, the fallen wizard who now called himself Sharkey.
After his defeat at Isengard, Saruman had made his way to the
Shire to exact revenge on the hobbits, particularly Frodo Baggins, whom he
blamed for his downfall.
Under Saruman's direction, the beautiful landscape of the Shire was
systematically destroyed. The new rules forced hobbits to surrender most of
their produce, while trees were needlessly cut down and replaced with ugly new
buildings. The once-pristine rivers became polluted, and the pleasant gardens of
Hobbiton were replaced with industrial machinery.
The takeover had been facilitated by Lotho Sackville-Baggins, who had styled
himself as 'Chief' of the Shire. Lotho's ambition and greed led him to initially
welcome Saruman's men, believing he would maintain control while gaining power
and wealth. His alliance with the fallen wizard would prove to be his ultimate
undoing.
Saruman gathered a force of ruffians, mostly Men from the south, who terrorized
the local population. These bullies enforced arbitrary rules, took the best of
everything for themselves, and imprisoned any hobbits who dared to resist. Their
abuse of power created an atmosphere of fear and resentment throughout the
Shire.
Raising the Shire

The turning point came when Merry Brandybuck sounded the Horn of Rohan, a gift
from King Éomer. The clear notes of the silver horn rang across Bywater and
beyond, awakening the fighting spirit of hobbits everywhere. The sound reminded
them of their ancient courage and stirred them to action against their
oppressors.
Under the guidance of the returned travelers, the hobbits quickly organized
themselves into an effective fighting force. Years of hunting and archery
practice proved valuable as they prepared to defend their homeland. The natural
discipline and organization of hobbit society helped them rapidly form into
effective units.
Swift messengers were dispatched to all four Farthings of the Shire, carrying
word of the uprising. The messages called for all able-bodied hobbits to join
the resistance, and the response was overwhelming. From Buckland to the Far
Downs, hobbits armed themselves with whatever weapons they could find and began
marching toward Bywater.
The Battle Strategy
Merry and Pippin's military experience from their participation in the War of
the Ring proved invaluable during the preparation for battle. Merry had served
in Rohan and fought in the Battle of the Pelennor
Fields, while Pippin had served in
Gondor and participated in the Battle of the
Morannon. Their knowledge of military tactics
and strategy would prove crucial in organizing the hobbit resistance.
The hobbits chose Bywater as their battlefield, using the natural features of
the landscape to their advantage. Under Merry's direction, they positioned
archers behind hedges and walls, while other hobbits prepared to meet the
ruffians head-on. The careful positioning would prove crucial in the coming
battle.
The hobbits worked through the night to create effective defensive positions.
They built barricades across the road and concealed groups of fighters in the
surrounding fields and houses. Their knowledge of the local terrain allowed them
to prepare numerous escape routes and alternative positions, giving them a
significant tactical advantage.
The Main Confrontation

The battle began when nearly two hundred ruffians marched into Bywater,
confident in their superior size and strength. They had grown complacent from
months of terrorizing the seemingly docile hobbits and were completely
unprepared for organized resistance. The column of Men walked directly into the
prepared trap, unaware of the hundreds of hobbits waiting in ambush.
At the crucial moment, the hobbits revealed their true numbers. Over two hundred
hobbits emerged from their hiding places, surrounding the ruffians completely.
The Men found themselves facing opponents who, though smaller in stature,
greatly outnumbered them and held superior tactical positions.
Merry called out to the ruffians, offering them the chance to surrender
peacefully. He declared that armed hobbits surrounded them and that resistance
would be futile. This attempt at avoiding bloodshed demonstrated the hobbits'
inherent preference for peaceful resolution when possible.
When the leader of the ruffians responded with scorn and ordered an attack, the
Battle of Bywater began in earnest. The ruffians charged the barricades, but
their assault was met with a volley of arrows from hidden hobbit archers. The
element of surprise gave the hobbits an immediate advantage in the ensuing
combat.
Heroes of the Hour
Sam Gamgee's intimate knowledge of the Shire's geography proved crucial during
the battle. Having spent years tending gardens and walking the paths of Hobbiton
and Bywater, he could guide groups of hobbits through hidden shortcuts and
concealed paths. This allowed the hobbit forces to outmaneuver the ruffians
repeatedly during the fighting.
Merry and Pippin demonstrated remarkable leadership throughout the battle,
drawing on their recent military experiences. They coordinated the hobbit forces
effectively, ensuring that the ruffians remained surrounded and couldn't escape
to cause havoc elsewhere in the Shire. Their confident commands and strategic
decisions helped maintain order among the hobbit fighters.
Farmer Cotton and his sons fought with particular distinction during the battle.
Their bravery inspired other hobbits to stand firm against the ruffians, and
their knowledge of local farming tools helped turn ordinary implements into
effective weapons. The Cotton family's resistance became legendary in later
hobbit tales of the battle.
The Casualties
The Battle of Bywater was not without its cost to the hobbits. Nineteen brave
hobbits lost their lives defending their homeland, making it the bloodiest
battle in the Shire since the Battle of Greenfields centuries earlier. Each
fallen hobbit was honored as a hero who had given their life to free the Shire
from oppression.
The ruffians suffered much heavier casualties, with nearly seventy of their
number killed during the fighting. Many others were wounded, and those who
surrendered were taken prisoner. The decisive victory demonstrated that hobbits,
when united and determined, could be formidable warriors despite their peaceful
nature.
The hobbits showed remarkable organization in the aftermath of the battle,
tending to both their own wounded and their prisoners. The prisoners were held
under guard but treated fairly, demonstrating the hobbits' civilized nature even
in victory. The wounded received care regardless of their allegiance, showcasing
hobbit values of mercy and compassion.
Sharkey's End
Following the battle, the hobbits confronted Saruman at Bag End, where he had
made his headquarters. The fallen wizard remained defiant even in defeat,
revealing his contempt for the hobbits and their way of life. The confrontation
brought to light the full extent of his malice and bitterness.
During this confrontation, the hobbits learned the tragic fate of Lotho
Sackville-Baggins. Saruman revealed that
Wormtongue had murdered Lotho on his orders,
showing the true evil that had taken root in the Shire. This revelation shocked
even those who had opposed Lotho's rule.
Saruman's own end came swiftly and unexpectedly when Wormtongue, driven by years
of abuse and a final cruel taunt from his master, cut Saruman's throat. The
wizard's body seemed to dissolve into mist, blown away by a cold wind from the
West. This marked the final end of Saruman the White, once the head of the White
Council.
With Saruman's death, the last battle of the War of the Ring came to its
conclusion. The fact that this final conflict took place in the Shire, far from
the great battles of Gondor and Rohan, served as a reminder that even the
smallest and most peaceful places could be touched by the great events of
Middle-earth.
Historical Significance
The Battle of Bywater represented more than just the last conflict of the War of
the Ring. It marked the moment when hobbits proved to themselves and others that
they could face great challenges with courage and resolve. The victory
demonstrated that the Shire's peaceful nature was a choice rather than a result
of weakness.
The battle revealed the hobbits' remarkable capacity for organization and
coordination when faced with a serious threat. Their ability to quickly
mobilize, create effective battle plans, and execute complex tactical maneuvers
surprised even those who knew them well. This organizational capability would
serve them well in the years to come.
The battle's outcome had a lasting impact on how hobbits viewed themselves and
their role in the wider world. While maintaining their peaceful way of life,
they gained a new confidence in their ability to defend themselves and their
values. This self-assurance influenced the Shire's approach to self-governance
in the Fourth Age.
Aftermath and Recovery

In the days following the battle, the hobbits worked quickly to dismantle the
symbols of Sharkey's rule. The new gates, guard houses, and other structures
built during the occupation were torn down. The arbitrary rules and restrictions
that had oppressed the Shire were officially abolished, returning freedom to the
inhabitants.
The challenging task of restoring the Shire to its former beauty began
immediately after the battle. Hobbits from all four Farthings joined together to
clean up the damage caused during Sharuman's rule. The unity shown during the
battle continued in these restoration efforts, strengthening the bonds between
different parts of the Shire.
Sam Gamgee played a crucial role in healing the Shire's wounded landscape. Using
the gift of earth from Galadriel's garden, he planted
trees throughout the Shire, including a mallorn tree in the Party Field. His
efforts ensured that the natural beauty of the Shire would not only be restored
but enhanced, making the land even more beautiful than before.